
Step 1: Unscrew the screws on both sides of the metal cover at the top of the chain.

Step 2: Pass the wires through the removed metal plate.
Step 3: Connect the wires to the ceiling wiring and test if the bulb lights up properly.
Step 4: Attach the metal plate to the ceiling.
Step 5: Reinstall the metal cover onto the plate using the screws.

Step 6:
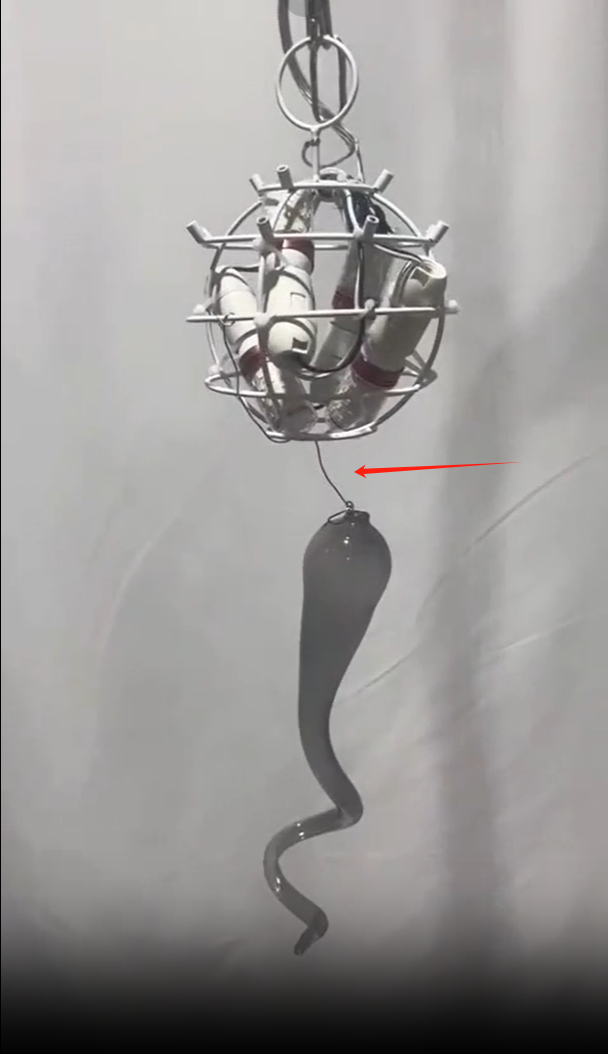
Please install the glass in a safe and comfortable environment.
The glass is connected to the chandelier frame by iron wire(g).
Points to note when installing:
a. The glass needs to be installed from the bottom to the top.
b. For the bottom layer of glass, one-fifth of the iron wire(g) is tied to the glass, and the other one-fifth of the glass is tied to the lamp frame, and the middle three-fifths is in a hanging state. (The final chandelier is in a triangular shape).
c. One-fifth of the wire is reserved for the penultimate layer in a hanging state. (The final chandelier is in a triangular shape).
d. The rest of the glass should be as horizontal as possible and perpendicular to the lamp frame, with the glass opening close to the chandelier lamp frame. Make the glass look upright.
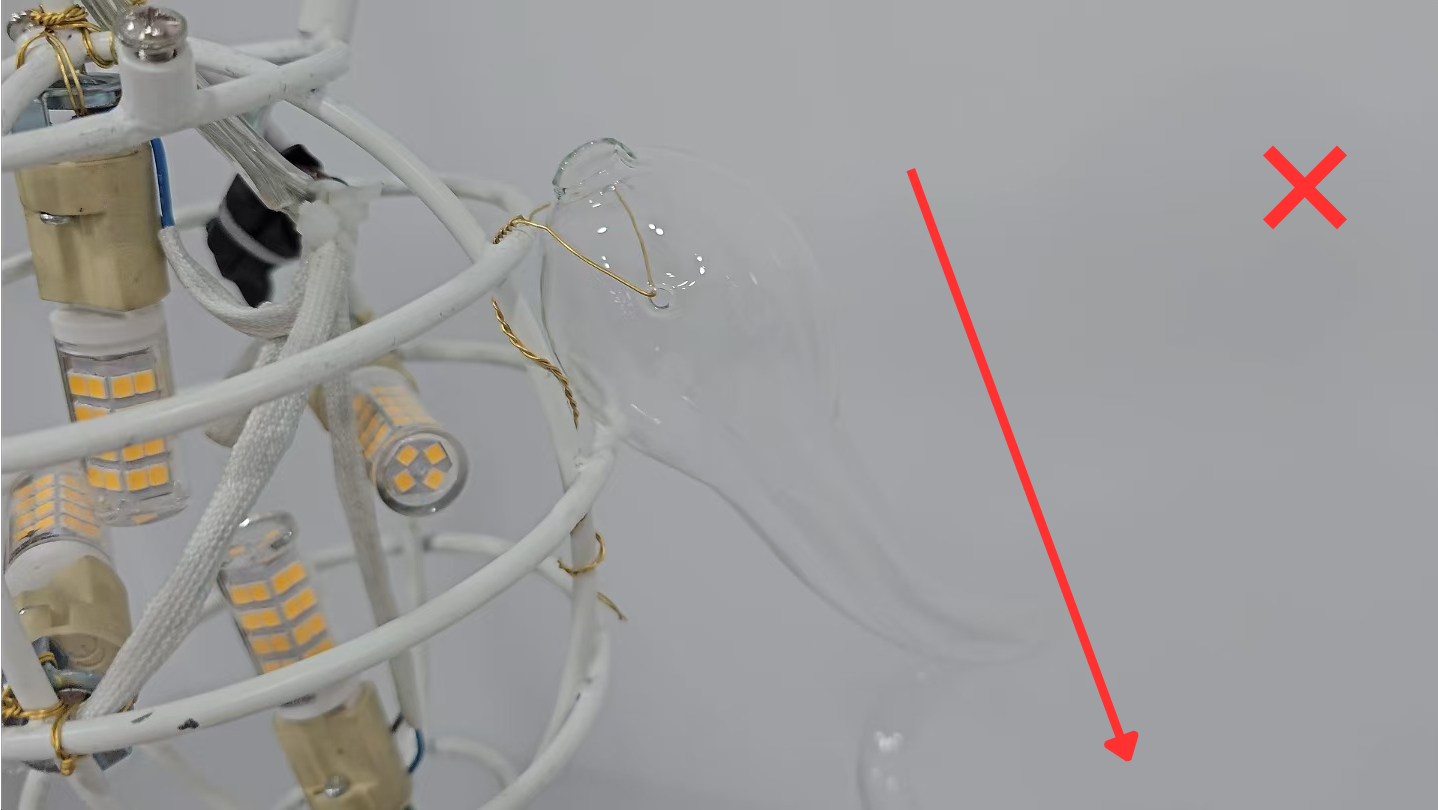
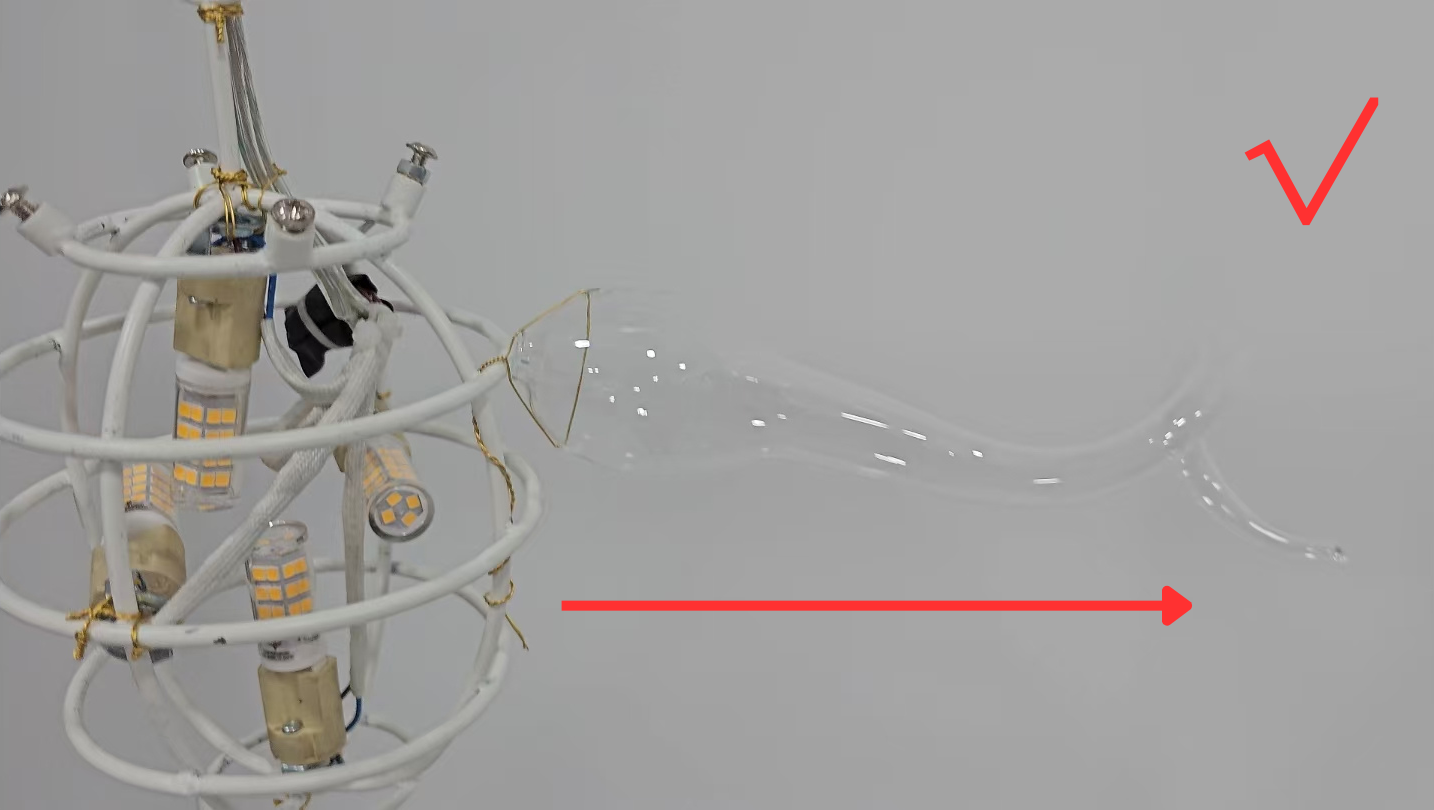
e. In order to present this state, try to let the iron wire at the end connected to the lamp frame wrap under the lamp frame.
f. For the combination of glass colors, please refer to our product pictures.
Of course, we also recommend that you freely install it according to your own color or shape ideas to assemble your own unique glass chandelier.